How to export your Wordpress data before using PowerImporter

View the video tutorial:

Follow the step-by-step instructions below:

STEP 1 DOWNLOAD THE FREE WP ALL EXPORT PLUGIN
https://en-gb.wordpress.org/plugins/wp-all-export

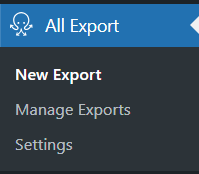
STEP 2 CREATE A NEW EXPORT IN THE WP ALL EXPORT PLUGIN
Once your plugin is installed, in All Export in your menu, click on "New Export"
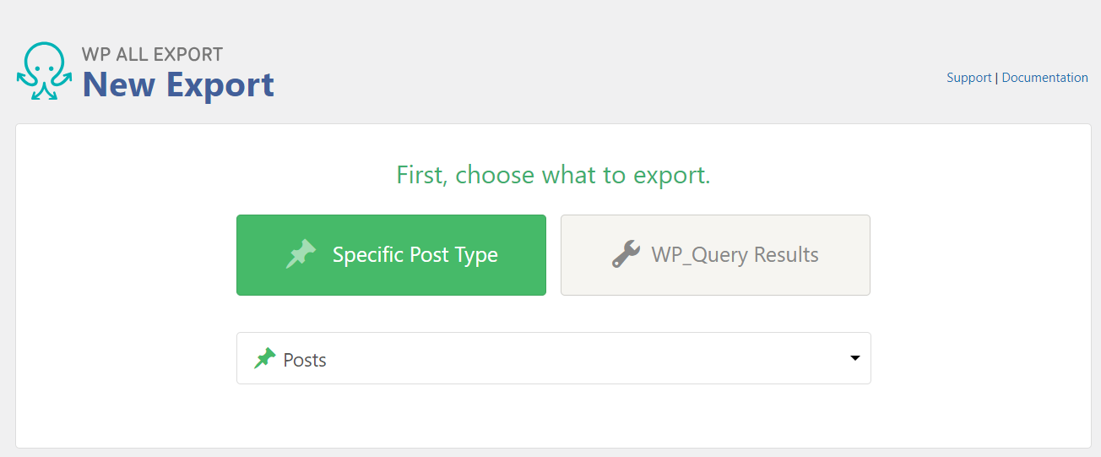
A screenshot showing how to use the export plugin for the Wordpress to Webflow data migration in PowerImporter

STEP 3 SELECT POSTS
In "Specific Post Type", select "Posts" (as this is what PowerImporter will be migrating).

A screenshot showing how to choose the post type in the export plugin for the Wordpress to Webflow data migration in PowerImporter

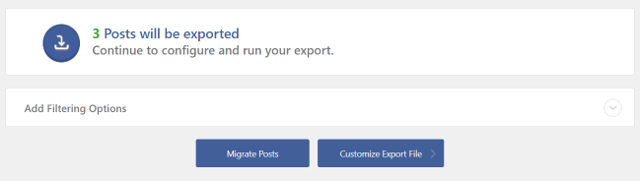
STEP 4 CUSTOMISE EXPORT FILE
Click on "Customise Export file"

A screenshot showing how to customise the export file in the export plugin for the Wordpress to Webflow data migration in PowerImporter

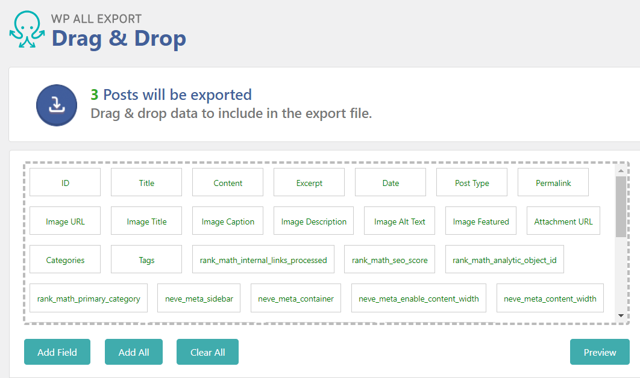
Then click on "Add All" (this is recommended so you are sure your file won't be missing any fields)

A screenshot showing how to select all files in the export plugin for the Wordpress to Webflow data migration in PowerImporter

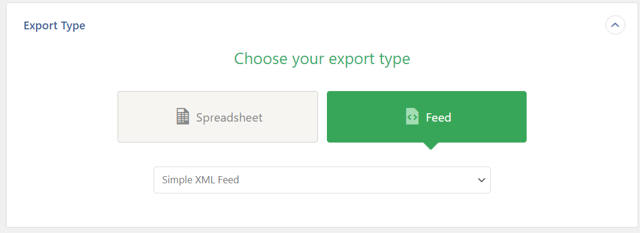
STEP 5: CHOOSE YOUR EXPORT TYPE
Click on Feed > Simple XML Feed

A screenshot showing how to choose an XML feed in the export plugin for the Wordpress to Webflow data migration in PowerImporter

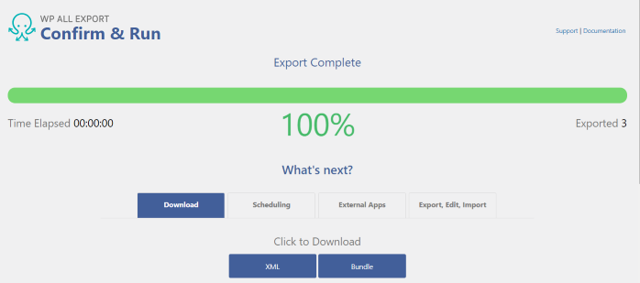
STEP 6 : CONFIRM AND RUN EXPORT
Click on "Confirm and Run Export"

A screenshot showing how to run an export in the export plugin for the Wordpress to Webflow data migration in PowerImporter

STEP 7 : DOWLOAD YOUR FILE
Click on the XML button to download onto your computer.

A screenshot showing how to download an export in the export plugin for the Wordpress to Webflow data migration in PowerImporter

STEP 8 : UPLOAD YOUR FILE IN POWERIMPORTER
In PowerImporter, step 2, upload your XML file.
See detailed instructions here.