How to switch to Webflow API V2
PowerImporter customers switching from API V1 to API V2

Webflow has announced the deprecation of their legacy API V1, which PowerImporter has been using ever since we started supporting Webflow. As Webflow moves to API V2, any application using API V1 will stop functioning after December 31, 2024. That includes PowerImporter.
More info on the deprecation by Webflow can be found on their website here.
When
Webflow's API V1 will be discontinued by Webflow on December 31st 2024.
PowerImporter syncs that use API V1 will cease functioning on and after January 1st 2025.
What do I need to do?
> If you created your PowerImporter account before August 1, 2024, your sync is using API V1.
You'll need to switch to API V2 by reconnecting your Webflow site once in PowerImporter before December 31, 2024. This is a one-time task that should only take about two minutes. Your existing collection and field mappings will be retained, so no re-mapping is necessary, and no information on your mappings will be lost during the process.
Unfortunately PowerImporter cannot reconnect your Webflow site on your behalf, which is why we are informing you ahead of the API deprecation.
> If you created your PowerImporter account after August 1, 2024, there is nothing for you to do. Your sync is already running with Webflow's API V2.
Is the Webflow API V2 reliable?
Webflow’s API V2 is still being refined, and documentation is currently limited. While we have thoroughly tested it, we can’t guarantee a completely error-free experience when syncing data in PowerImporter.
Rest assured, we’ll work to resolve any issues as quickly as possible.
How do I do this?
In Webflow (Recommended)
Before proceeding, we recommend backing up your Webflow site as a precaution. For instructions on creating a backup, refer to this Webflow page.
In PowerImporter (Required)

We suggest doing this switch during off-peak hours for your website traffic, just in case.
Log into your PowerImporter account: https://app.powerimporter.com/home
Then follow these steps:
> For Airtable to Webflow syncs
For Autosync or Manual Sync:
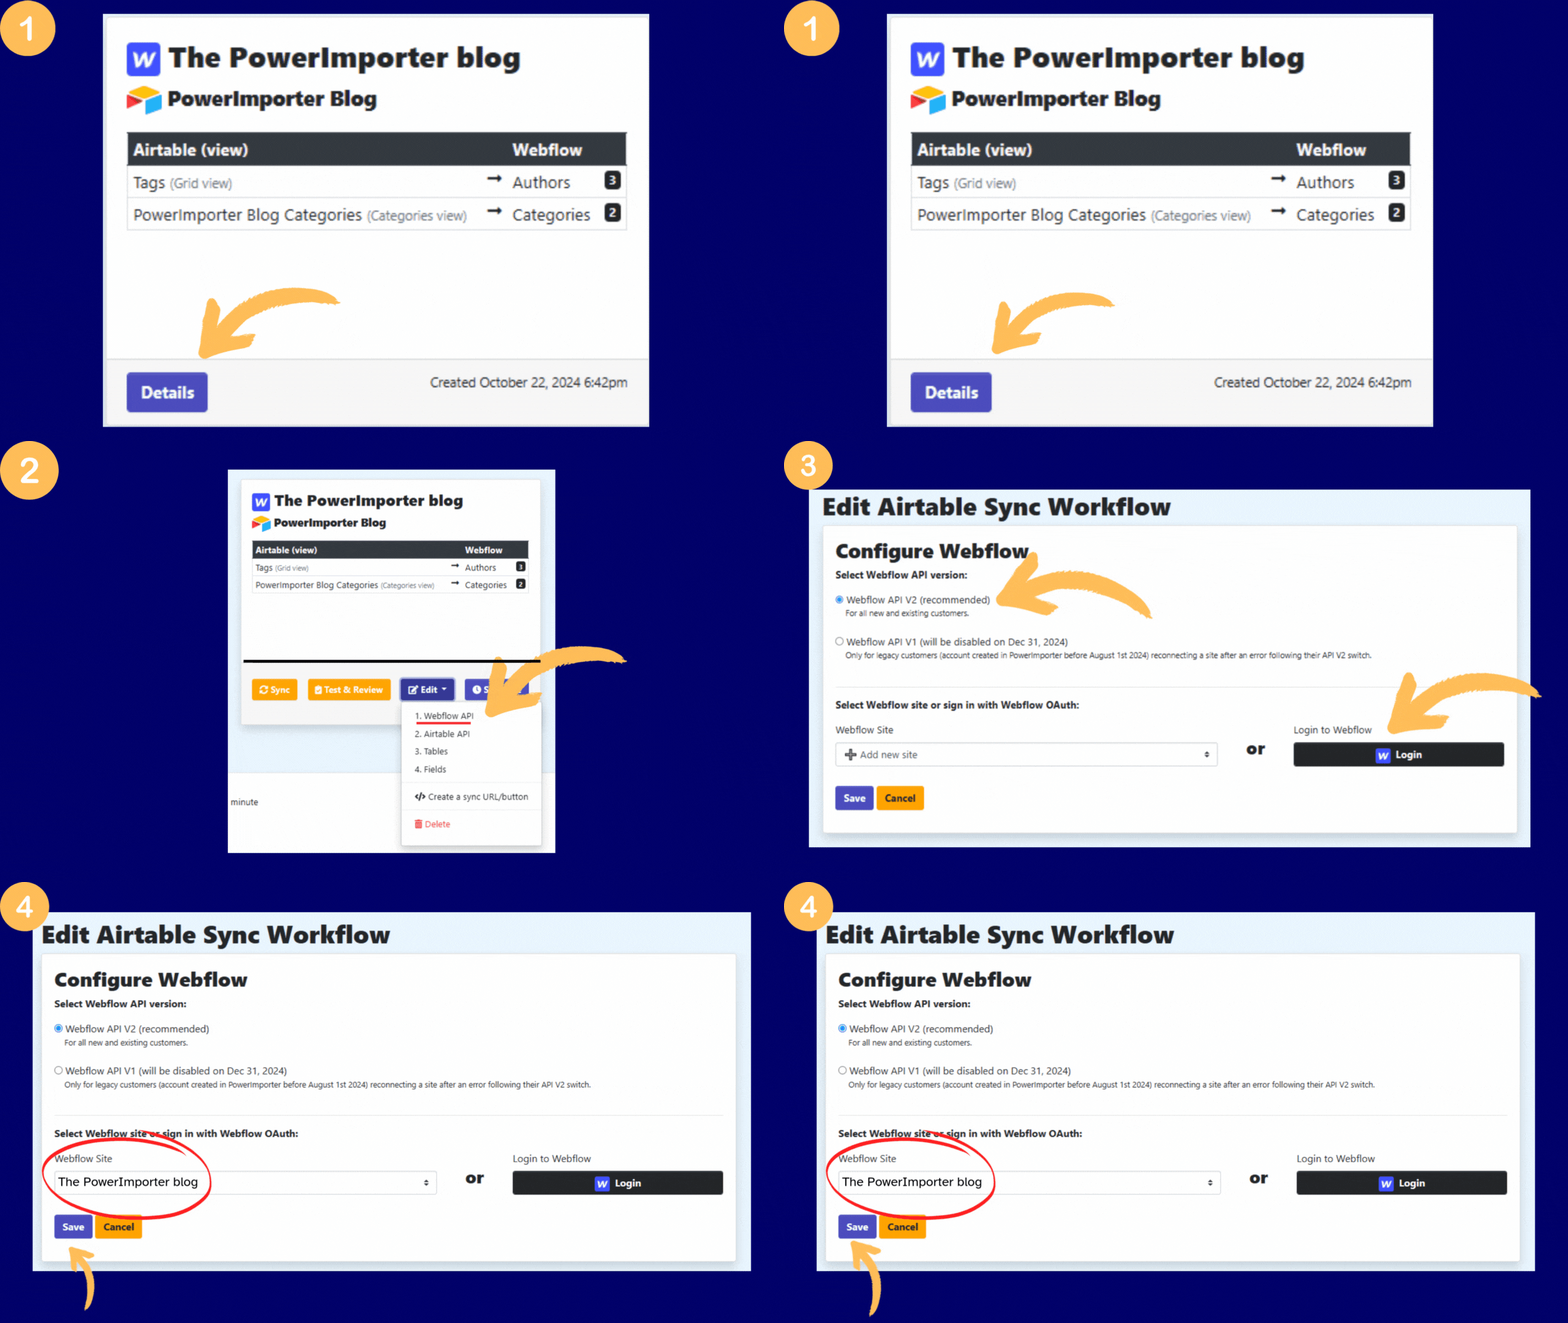
Step 1. Go to your Sync, Details > then Edit.
Step 2. If you're using Autosync, go to Step 4 and click on “Cancel schedule”. If you sync manually move directly to step 3:
Step 3. Click on Edit>1. Webflow API, then select API V2
Step 4. Click on Login (recommended) or "Add a New Site" if you'd prefer to use an API V2 token, and follow the connection process.
Step 5. Once you have connected your site, the reconnected site will appear in your list of sites.
Step 6. Select this newly connected site.
Step 7. Save.
Step 8. Double-check your Airtable base in Step 2, Collection mappings in Step 3, and Field mappings in Step 4. Save.
Step 9 Run your Sync.
Step 10. Review your sync results.
Step 11. If you're using Autosync, reschedule your Autosync.
> For CSV to Webflow Syncs
Step 1. Go to your Sync, Details > then Edit.
Step 2. Click on "Webflow API", then select API V2
Step 3. Click on Login (recommended) or "Add a New Site" if you'd prefer to use an API V2 token, and follow the connection process.
Step 4. Once you have connected your site, the reconnected site will appear in your list of sites.
Step 5. Select this newly connected site.
Step 6. Save.
Optional - only if you want to sync immediately:
Step 7. Upload your CSV file in the next step
Step 8. Confirm or update your collection and fields mappings. Save.
Step 9. Run your sync.
Step 10. Review your sync results.
> For WordPress to Webflow Migrations
1. Go to your Sync, Details > then Edit.
2. Click on "Webflow API", then select API V2
3. Click on Login (recommended) or "Add a New Site" if you'd prefer to use an API V2 token, and follow the connection process.
4. Once you have connected your site, the reconnected site will appear in your list of sites.
5. Select this newly connected site.
6. Save.
Optional - only if you want to sync immediately:
7. Upload your XML file in the next step
8. Confirm or update your collection and fields mappings. Save.
9. Run your sync.
10. Review your sync results.
How do I check if I have switched to API V2 correctly?
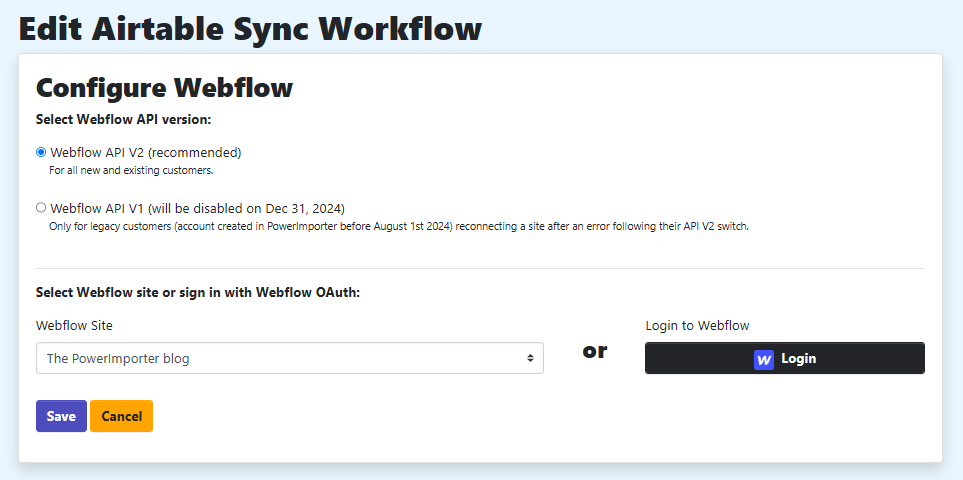
In you sync, click on Edit>1. Webflow API, and check that:
> API V2 is selected
> Your Webflow site is listed underneath "Webflow Site"
as per the screenshot below:

What if my sync encounters an error after switching to API V2?
If you experience any issues after switching, please contact us via the Chat icon or by email at help@powerimporter.com. We’ll resolve any errors as quickly as possible.
Please note: when you contact us because you have an error in your sync, the error should be the last message shown in your PowerImporter sync log, so our team can investigate it. This is because PowerImporter only stores the last sync ‘s data in the system.
If you revert to a backup version of your site in Webflow, please be aware that this may cause your PowerImporter sync to fail during the next run. In this case, you may need to clear your CMS, publish the empty site, and re-sync it in PowerImporter.
Our support hours are Monday to Friday, 9 a.m. - 6 p.m. GMT (e.g. UK time). If you need assistance outside of these hours, please contact us in advance so we can coordinate with our technical team.
I am not sure if I should be doing this switch or not, what shall I do?
If you are unsure, please contact us via the Chat icon or by email at help@powerimporter.com. We will let you know whether you need to switch or not.