A Quickstart Guide to Webflow Forms


Forms are one of the most common parts of a website—you can use them for everything from building an email list to generating customer leads. Additionally, many forms are gateways to complex sales and marketing funnels powered by tools like Drip. For example, you might send an email sequence to a lead sign-up with offers based on their browsing history.
Let's look at how to create a form in Webflow and connect to tools like MailChimp or Airtable, along with some best practices to keep in mind.
How to Create Webflow Forms
Webflow provides an easy-to-use, built-in form builder and manager. Like any other part of Webflow, you can build forms using a drag-and-drop interface and easily access form submissions without dealing with a lot of backend code or customization. However, there are a few caveats to keep in mind along the way to avoid any problems.
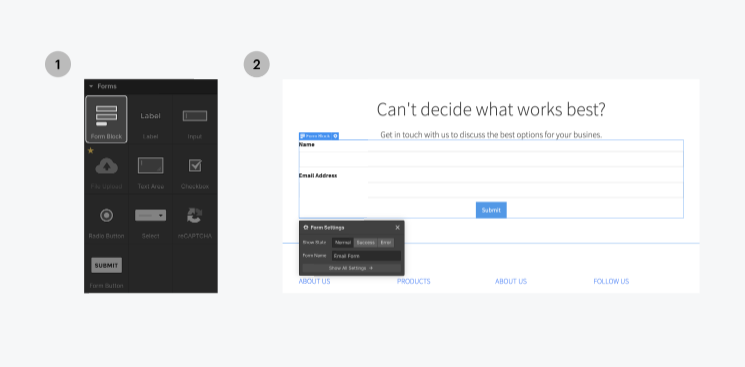
You can create forms in a few steps:
- Navigate to Add panel (A) > Elements > Forms.
- Drag a Form block and drop it onto your page.
- Customize the Form wrapper to suit your needs.
The Form wrapper contains various form inputs and elements (e.g., labels, input fields, file uploads, etc.) along with a success and error message. When using submit buttons, you can set the default button text and the waiting text that users see between clicking the button and when the form submission is complete.
Form submissions are accessible under Project settings > Form tab > Form submissions data or in the Editor > Form tab. In these areas, you will see the total submission count along with a table of data from each form submission. If the user uploads files, they will appear as download links. And you can export the table with the Download CSV button.
In addition, you can email every submission to an email address (e.g., if they're leads that require follow-up). You can configure the email settings in the Project settings > Forms tab and define the From Name, Email Address, Subject Line, Reply-to Address, along with other fields. You may also want to test forms to ensure emails aren't going into your spam folder.
Webflow Form Best Practices
Webflow Forms are pretty straightforward to build, but there are several best practices to keep in mind.
Forms are a standard gateway for spammers, so it's a good idea to have some defenses in place. CAPTCHAs are the most popular way to stop spammers using bots. Modern CATPCHAs appear only for suspicious visitors and use challenges that are easy for humans and difficult for robots to complete, such as identifying items in a picture.
Webflow makes it easy to add Google's reCAPTCHA to your form to prevent spam. After registering for an API key from Google, drag the reCATPCHA item from the list of form elements onto your form. Unfortunately, Webflow doesn't support more privacy-focused tools, like hCaptcha, as an alternative to prevent form spam.
In addition to preventing spam, forms collecting personal data may need to adhere to GDPR and/or CCPA regulations. On a high level, both of these laws encourage "data controllers" (you) to safeguard personal data and make it clear how they use the data. You may also need to disclose how you use third-party tools to process data (e.g., Zapier or Integromat).
Other best practices to consider include:
- Only require as much information as you need
- Make sure that your forms are mobile-friendly
- Use a bright color-contrasted CTA button to submit the form
- Consider A/B testing to determine what works best
- Have a plan to respond to new leads immediately
Integrations with Make & Zapier
Webflow's form-to-email functionality may be sufficient for some users, but many businesses need to route form data elsewhere. For example, you may want a newsletter form to automatically add a new subscriber on MailChimp or kick off a Drip automation. Or, you may wish to integrate a lead generation form with Salesforce or other CRM tools.
Make is one of the most popular ways to achieve these goals. You can build automated workflows that connect Webflow forms with various external solutions with a visual interface. You can even create entire sequences and use complex functions to compute values or standardize data before saving it to a database or spreadsheet.
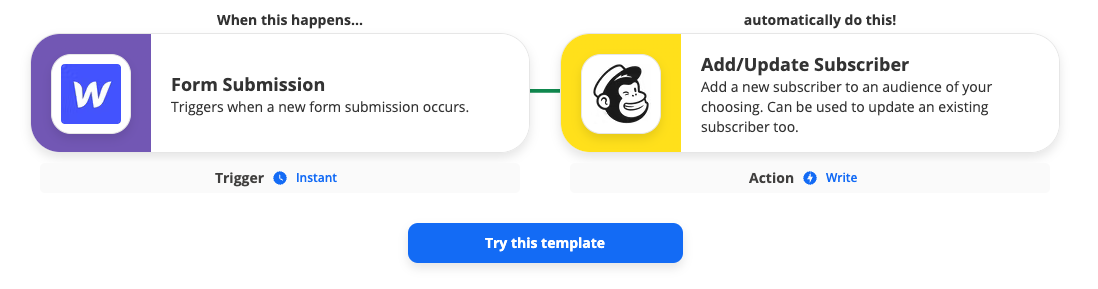
Zapier is another option to achieve these goals:
- MailChimp to subscribe a form submission to an email list
- Google Sheets to add form data to a new row
- Slack to alert people when a new lead comes from a form
- Trello to add a new card to follow up with form submissions
Unfortunately, the event-driven nature of these services makes them less-than-ideal for pre-existing or evolving data. For instance, suppose that you have thousands of past form submissions and want to add them to an Airtable lead database. Or, what happens if there's an error and an event misfires? Integromat and Zapier are ill-equipped to handle these cases.
PowerImporter Simplifies Integrations
PowerImporter makes it easy to map Webflow form submissions to Airtable and keep them in sync over time. Rather than using an event-driven approach, PowerImporter syncs the two data sources in real-time to ensure that it's accurate and up-to-date, even if an event misfires from Webflow's side or if the data changes over time.
PowerImporter makes it easy to map your data. Source: PowerImporter
Using PowerImporter is simple:
- Connect your Webflow site.
- Select an Airtable.
- Map your Airtable views to Webflow Collections.
- Map your Airtable fields to Webflow Collection fields.
In addition to form submissions, PowerImporter makes it easy to keep Airtable in sync with your Webflow CMS. Integromat and Zapier make it easy to add new blog posts when they appear on an Airtable, but they're not ideal for updating posts when content changes or importing old content. PowerImporter provides a much more elegant solution to keep everything in sync.
The Bottom Line
Forms are essential for most websites, handling everything from email subscriptions to lead generation. However, in many cases, website owners need to transfer the data from forms to other services, such as MailChimp or Google Sheets. While Integromat and Zapier make the process easier, PowerImporter is the best way to keep your data in sync.
Related posts
You might also be interested to read: