How to create an Airtable to Webflow sync in PowerImporter
View the video tutorial:
Follow the step-by-step instructions below:
1 Connecting Airtable and Webflow
Step 1: Create a new sync in PowerImporter
- Once you have created your PowerImporter account, navigate to "New syncs" on the top right corner.
- Click on "Create a sync for Airtable" to create your first sync
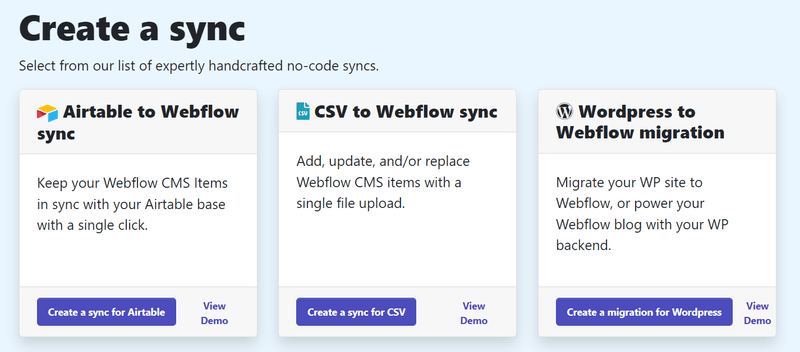
PowerImporter will take you through all the steps from now on :-)
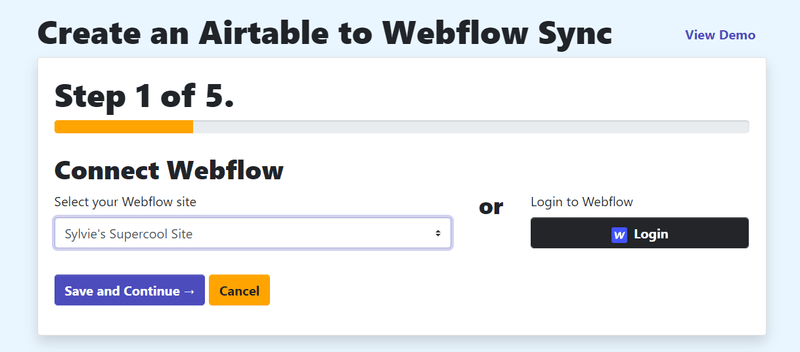
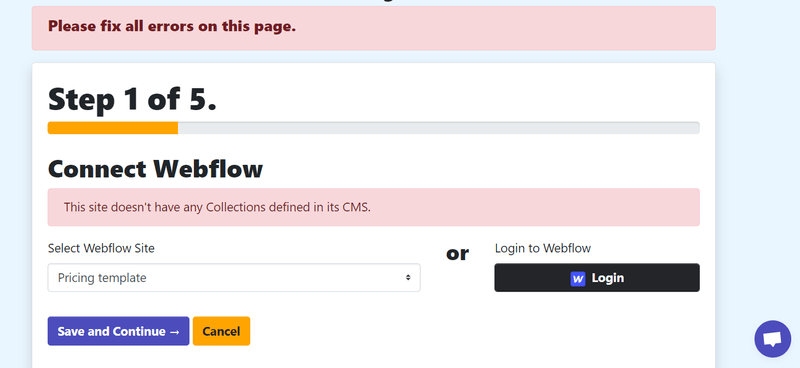
Step 2: Connect Webflow
- Connect to Webflow by clicking on "Login". Click here to see how the logging to Webflow will look like
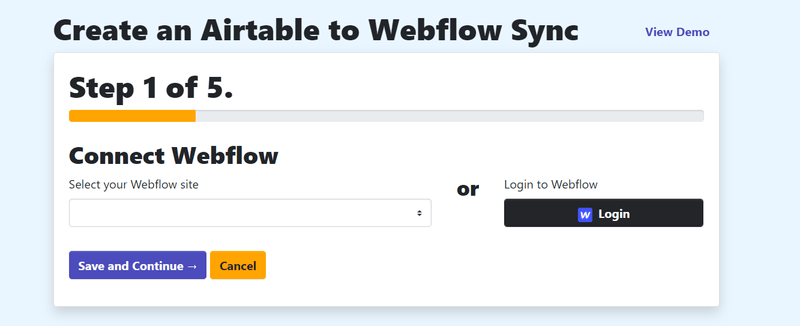
- Once you have connected to Webflow, your Webflow CMS site(s) will appear automatically under "Select Webflow site"
- Choose the Webflow CMS site you want to sync your data to.
- Once you have selected the Webflow CMS site you want to sync data to, click on "Save and Continue"
Please note that your Webflow CMS site needs to have collections set up, otherwise this error message will appear:
Step 3: Connect Airtable
You can connect your Airtable base in two ways:
- By clicking on "Login". Click here to see how the login process will look like
- By entering a Personal Access token. Click here to see how the personal access token will look like.
Do not forget to enter the 3 scopes when creating your Airtable token:
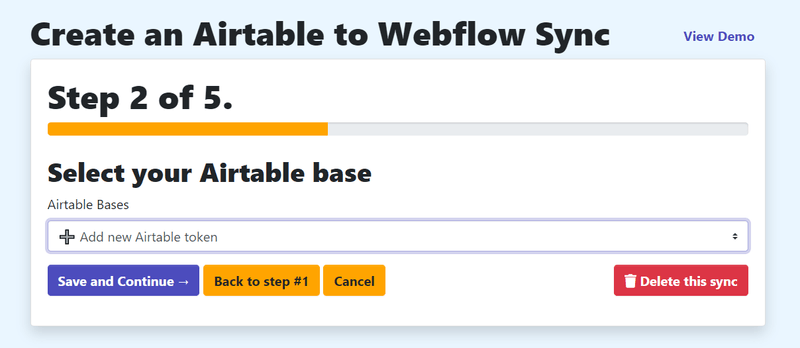
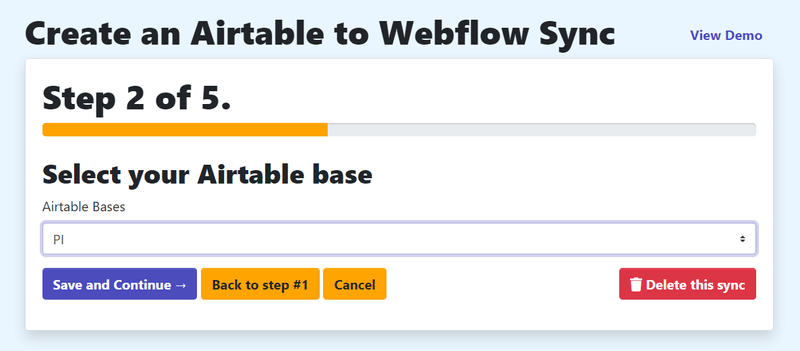
- Once you have connected to Airtable, your bases will appear automatically under "Airtable bases".
- Select the Airtable base you want to use for your sync.
- Click on Save and Continue.
You are now ready to create your first sync!
2 Creating your first sync
Once you have connected PowerImporter with Webflow and Airtable, you are ready to create your first sync!
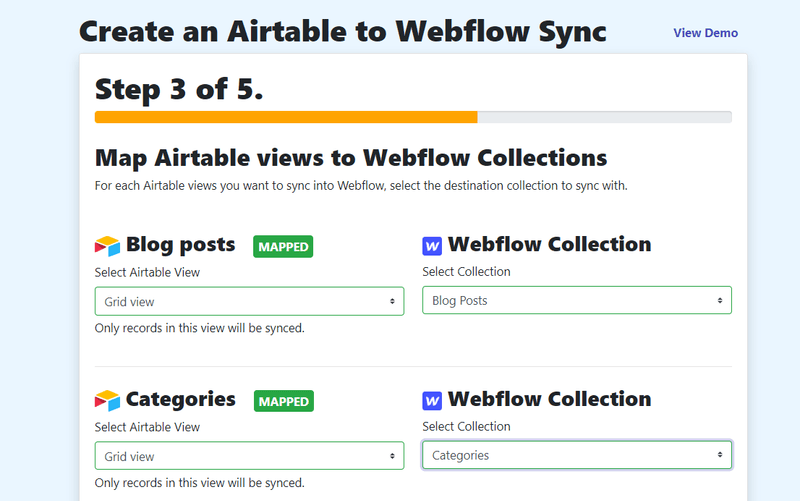
Step 4: Map Airtable views to Webflow collections
Your Airtable views and Webflow collections will appear automatically in each section.
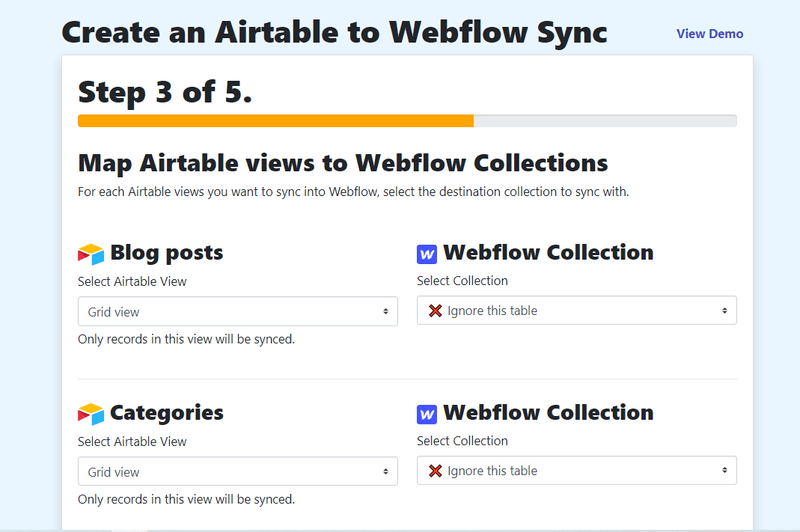
- Choose the Airtable view you want to sync on the left-hand side, for each Airtable base.
- Choose the collection you want to sync each airtable base to on the right-hand side
- Once all has been set up correctly, you will see a green "Mapped" field appear.
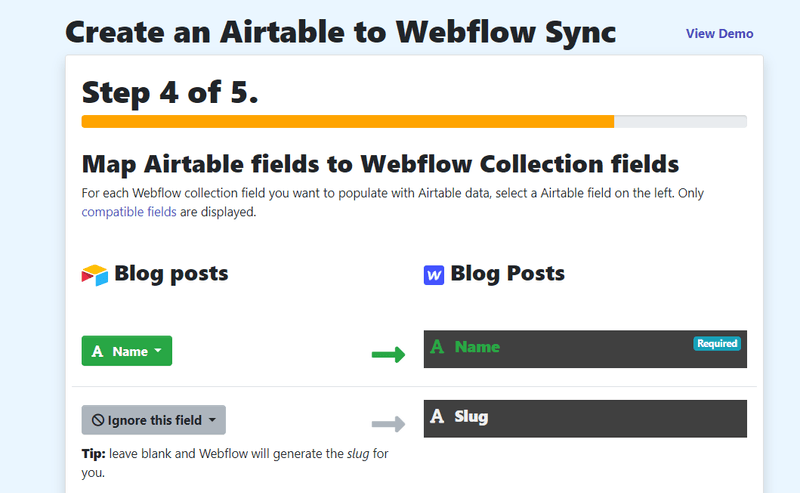
Step 5: Map Airtable fields to Webflow collection fields
You do not have to map every single webflow collection field. Just map what you want to sync.
Select each Airtable record you want to sync with the corresponding Webflow field.
You can view the supported Airtable and Webflow fields, and how they match each other here.
Plesae note you can choose to sync back from Webflow to Airtable for the Slug and Webflow ID fields.
This is optional. Leave "Ignore this field" if you do not want to sync back.
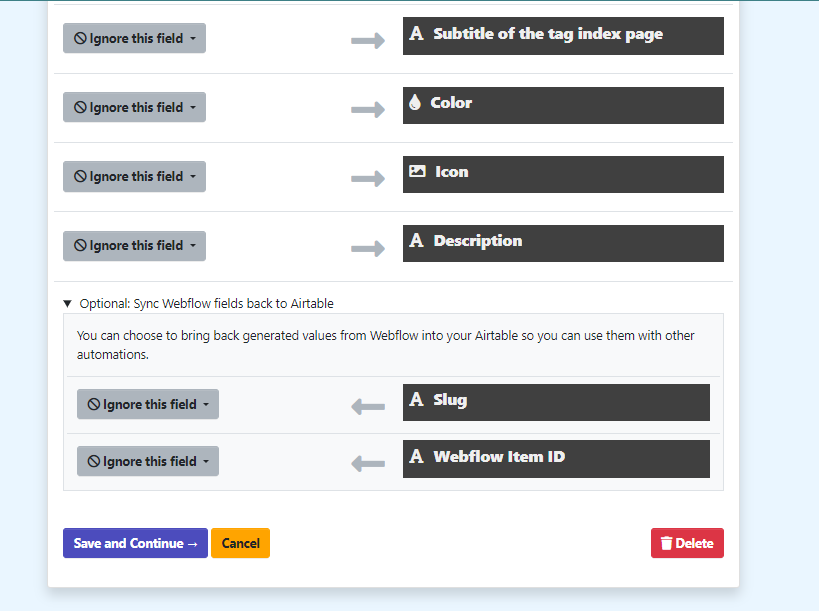
Once you have completed your mapping, click on Save and Continue.
You can always come back to this step and amend anything you want.
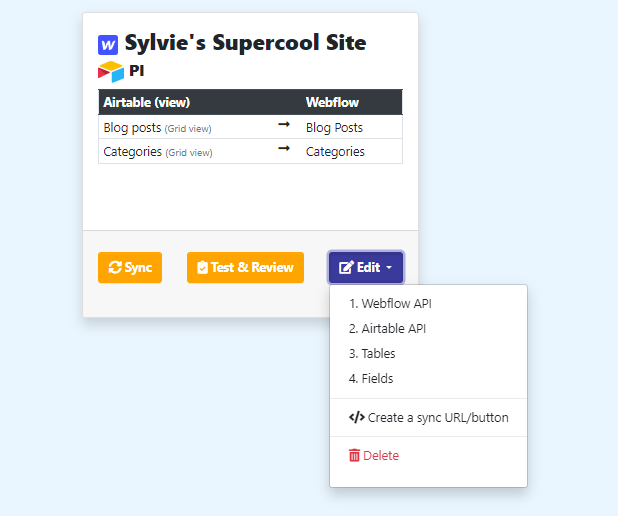
Step 6:Your sync is ready to go!
You can choose to test it first, or run it immediately.
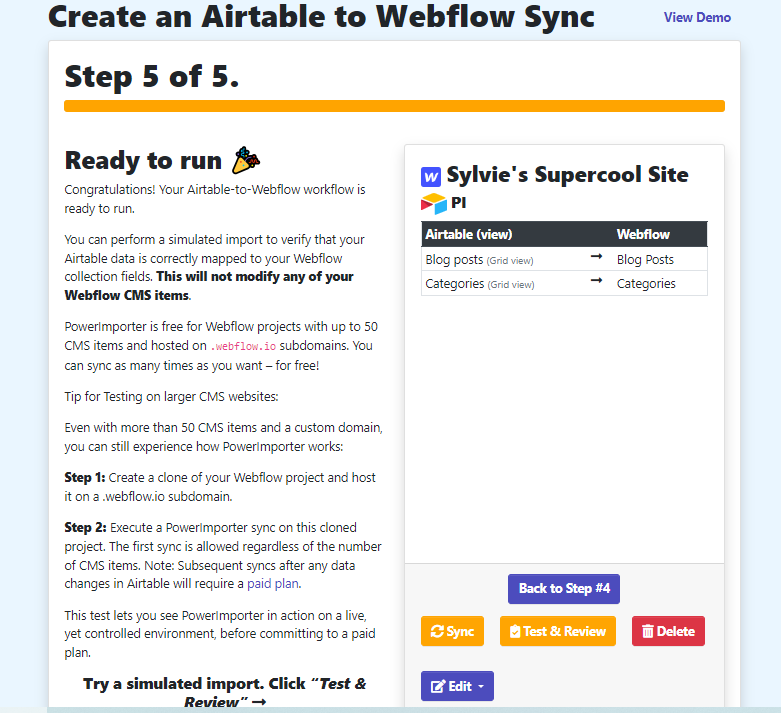
Please note you can always come back later on and amend any of your setups by clicking on "Edit".
You can also delete your sync by clicking on "Delete". Please note all workflow data is lost once you have deleted it.
3 Checking your sync logs
Once you have created and run your first sync, you can check your logs to see how things went.
> Logs when testing & reviewing
Testing and reviewing enables you to run the sync without calling the API - it means you can test it and see if it will work.
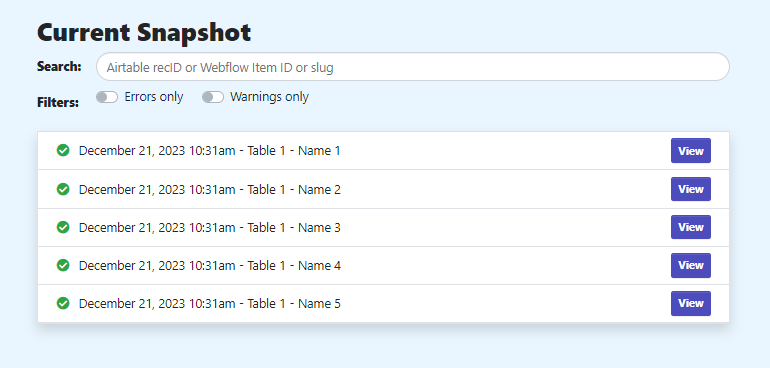
Your log will show whether there were any issues, which would show in the "Invalid" column.
The screenshot below shows a fully successful test.

- If you want more detail on each webflow collection item, you can click on "View details".
- You can filter the logs to view errors only for example, or warnings only.
- You can even search by Airtable record ID or Webflow item ID/item slug.
This is particularly useful for syncs with dozens/hundreds of items.
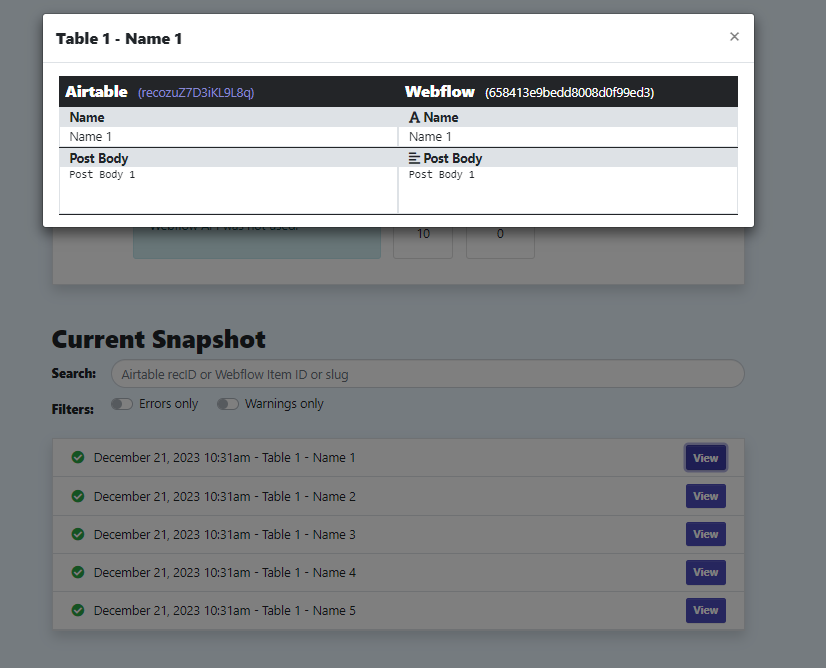
If you want more detail on one collection field, you can click on view: this will show the exact data that has been transferred over to Webflow.
You can even click on the Airtable record livk to view the Airtable field in your Airtable base.
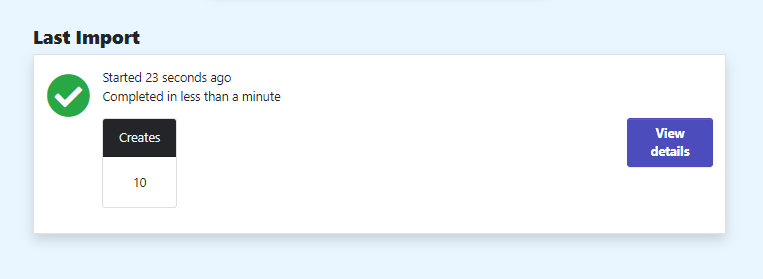
> Logs when running your first sync
Your first sync will show items in the "Creates" category.
- If you want more detail on each webflow collection item, you can click on "View details".
- You can filter the logs to view errors only for example, or warnings only.
- You can even search by Airtable record ID or Webflow item ID/item slug.
This is particularly useful for syncs with dozens/hundreds of items.
If you want more detail on one collection field, you can click on view: this will show the data that has been synced. You can even click to view the Airtable field.
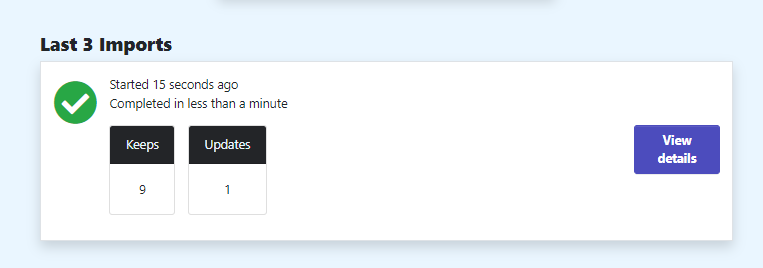
> Logs when running the same sync again
Your next sync will show items in different categories:
Keeps: Items existed already in Webflow and remained unchanged
Updates: Existing items in Webflow were updated because one or several data fields changed
Creates: New items created in Webflow
Deletes: Deleted items in Webflow because not present in the data anymore
Mapping errors: this is validation done by PI before calling the API.
API errors: Errors that came back after calling the API.
The categories will only show if there are relevant items in there.
The screenshot below shows a new sync with 1 updated field, the 9 others remained unchanged.
The screenshot below shows an updated sync with 1 warning, and some API errors. Details are available so you can see which item has errored and what you can do about it.

> Downloading your error logs
You can download your error logs into an Excel file.
This can make it easier for you to view all your errors at once.
Click on the "Export error logs" button, and an XLS file will be produced and downloaded to your computer.
And that's it! You are now a PowerImporter wizzard.
Enjoy!