How to Integrate Webflow with Airtable


Webflow is an excellent platform for designing websites, but it lacks a robust backend to handle blog posts and other data. As a result, many website owners turn to Airtable as a drop-in solution to augment the existing Webflow CMS for complex data requirements. Fortunately, there are several ways to integrate the two solutions.
Let's look at why Airtable has become a go-to for a backend and how you can integrate it with your Webflow front-end.

Why Airtable?
Airtable makes it incredibly easy to create and manage data. Unlike Microsoft Excel and other spreadsheets, you can use it to manage sophisticated workflows or build complex customer relationship management (CRM) solutions. But unlike SQL databases, they're trivial to build without scripting knowledge or database experience.
In addition to managing data, you can build Airtable views to showcase the data in different formats for various audiences. For instance, you can create a Kanban view for managers to visualize records on a board of stacked cards or a calendar view for marketers to visualize data based on when campaigns or blog posts go live.
If you have a Webflow website, Airtable is an excellent way to manage blog posts, eCommerce product inventory, or other data. For example, you can create a form for submissions, collect all post data, and quickly generate an editorial calendar for a blog. As a result, it's much easier to keep writers, developers, and marketers on the same page.
Airtable & Webflow
Airtable has become a popular backend for Webflow—a popular front-end design tool. While Webflow CMS provides some functionality, Airtable provides a much more robust tool for content teams to manage complex data. For instance, bloggers can build complex workflows that go from topic ideation to managing social media distribution.
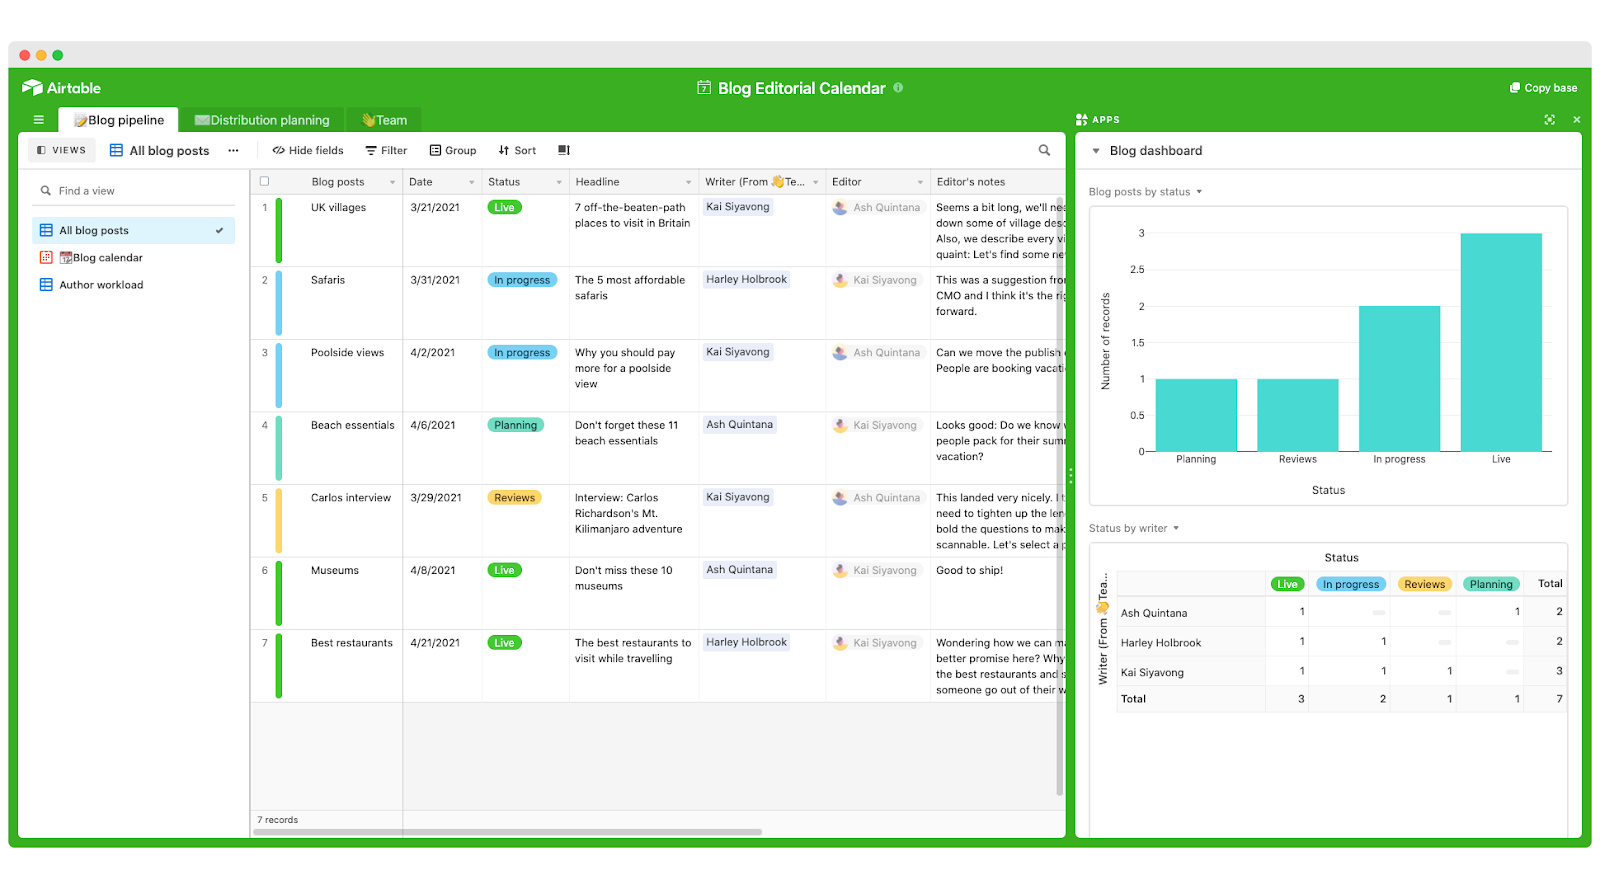
An example of an Airtable blog setup. Source: TemplateRoad
Airtable has also become a popular eCommerce backend. For example, many online shops add records on Airtable when new orders come in via their Webflow website. Airtable provides an easy way to manage and fulfill orders without having the massive overhead of a complex inventory management solution.
Basic Integrations with Zapier
Zapier is the most popular way to connect Webflow with Airtable. Using the Airtable + Webflow Zap, you can create new Webflow CMS items every time you create or update Airtable records. You can also create new eCommerce items or orders using Airtable data, making the platform useful for keeping essential inventories in sync.
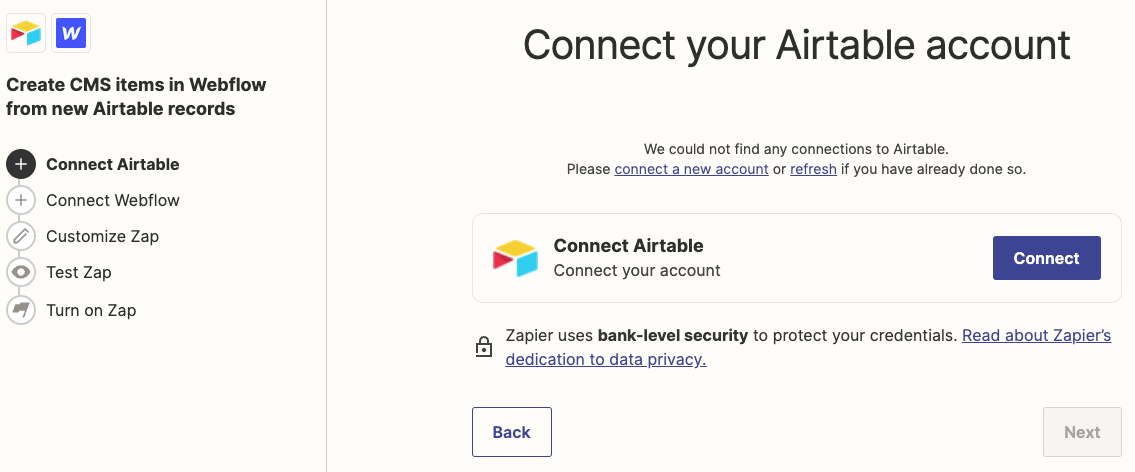
Zapier makes it easy to connect Airtable to your Webflow CMS. Source: Zapier
There are a few steps to using Zapier:
- Sign in to your Zapier account.
- Click on Make a Zap.
- Choose Airtable as your trigger app.
- Select Webflow as your action app.
- Select "Create CMS Item" as the action and map the fields from Airtable to the fields in your CMS collection.
- Hit "Create & Continue" to create the Zap.
Zapier is excellent for basic use cases, but many users quickly experience edge cases. For instance, mapping reference fields, syncing images, generating embed codes, and updating existing collection items can quickly become a challenge that involves numerous workarounds. As a result, advanced users should consider alternative solutions.
In terms of cost, Zapier has a free plan that lets you create up to five zaps and process 100 tasks per month. If you need more power, you can upgrade to premium plans to increase these numbers and reduce processing times from 15 minutes to just one minute. Other premium features include formatters, custom logic, and additional users.
Syncing with PowerImporter
Zapier makes it easy to import records from Airtable to Webflow, but keeping content in sync is a different story. PowerImporter simplifies the process of keeping Airtable and Webflow in sync consistently. For example, if you update a record in Airtable, the associated record will update in Webflow. As a result, it's a superior long-term solution to the problem.
Here’s how it works:
The platform also automatically handles common edge cases:
- Reference and multi-reference fields. PowerImporter automatically sets reference fields for you based on the links you've defined in your Airtable base.
- Images and attachments. PowerImporter automatically transfers images and attachments into Image, Multi-Image, or File fields in Webflow, so you don't need webhooks or API calls.
- Rich text fields. PowerImporter automatically converts Airtable's rich text fields into HTML fields in Webflow, making it easy to create the blog posts you want with style.
- Video previews for YouTube. PowerImporter automatically detects YouTube links and generates the embed code in Webflow without custom JavaScript.
PowerImporter is free for up to 50 CMS items with manual syncing on Webflow.io sites. Paid plans start at $29 per month for 500 CMS items, hourly auto-syncing, and custom domains. You can expand up to 10,000 CMS items per month with a 1-minute auto-sync and priority support for $99 per month if you have larger websites.
In addition to Airtable, PowerImporter also supports CSV and WordPress integrations. With these, you can easily import bulk CSV data (e.g., historical posts) or use WordPress as a headless content management system (CMS) for more robust capabilities. Note: The WordPress integration remains in early access.
The Bottom Line
Airtable is a popular backend for Webflow data, making it easy to keep designers in sync with other team members across an organization. While Zapier is the most common way to integrate the two platforms, PowerImporter provides the best way to keep data in sync while handling several common edge cases that tend to arise over time.
If you're interested in trying PowerImporter, sign up for free today and see how easy it is to keep everything in sync!
Related posts
You might also be interested to read: